Archive

Autumn Recipes

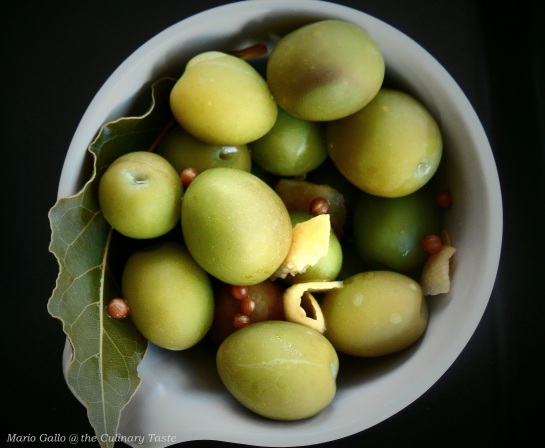
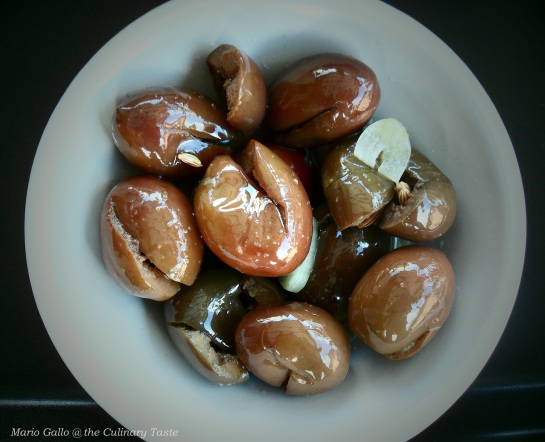
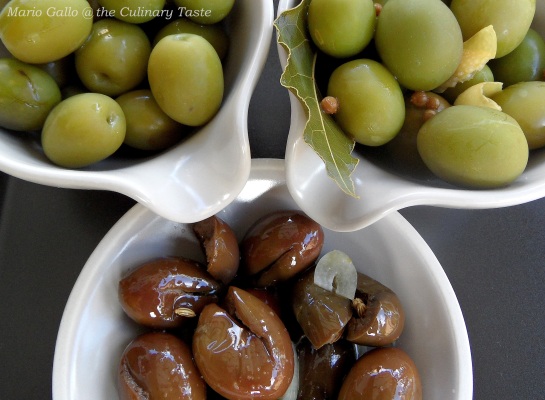
Top left: Tuscan olive pickles; top right: Provençal olive pickles; bottom: crushed olives

Autumn is harvest time: apples ripen, grapes are vintaged, olives picked. Grapes and olives, especially – together with wheat – are unreplaceable fruits of the earth: wine and oil are the basis of our culinary culture and diet. But, if grapes can be normally tasted as fresh fruits, olives must be treated before eating.

Roaming through markets in early autumn, your attention would be probably caught by amounts of fresh green olives – they can be sold loose or in boxes – and you’d be probably tempted to taste them as they are. Well, never try! Green olives as picked from the tree are unbearably bitter – more, they are inedible. To get rid of their bitterness they need to be treated either in water or in a brine solution for several days, changing the solution every day, before they are ready. Here, I post three different recipes for olive pickles: two invloving brine (a Tuscan and a Provençal recipe) and one for making crushed olives, a method commonly used in Southern Italy.

Fresh untreated green olives

Tuscan Olive Pickles

Ingredients
1 kg green olives
2 lt water
80 g caustic soda

The recipe for making these pickles is really easy but needs a little attention. Wash olives, discarding all those that are damaged. Add 40 grams of caustic soda (remember to wear kitchen rubber gloves because caustic soda is corrosive) for each liter of water. Use enough water to completely cover olives. Let olives rest in this solution for about 6-7 hours, then throw it away. Cover olives with new water. You have to change water every day for about a week or until, tasting olives, they lose all their bitterness.

Now prepare brine: boil water with salt (50 to 100 g per liter according to taste), let it cool down, then pour over olives in a glass jars (airtight or with screw lids). Wait about a week before eating them.

Provençal olive pickles

After treating olives as mentioned above you can aromatize them with herbs as you like. This is one of they way olives are prepared in Provence. I used lemon though orange would be a better match.

Ingredients
1 kg treated olives (as explained above)
50-100 g salt per liter of water (according to taste)
1 laurel leaf
a handful of fennel seeds
15 coriander seeds
1 lemon, zest only (or 1/4 orange, zest only)

Let all the ingredients boil for about 15 minutes, then let it cool and pour over olives in glass jars. Wait about a week before eating them.

Provençal olive pickles

Southern Italy crushed olives

Crushing olives is a common way to prepare olives in Southern Italy. To do so, you have to literally crush them one at a time with a hammer or pestle or anything functional so that the pit comes out and can be removed (you’d better wear gloves to prevent your fingers from being stained). After they’re all crushed, cover them with a brine made with 50-100 grams of salt per liter of water. Change the brine every day for about 3-4 days. Then soak olives in water without salt for further 3-4 days changing water every day. It can take a little longer depending on how bitter olives are (note that with this crushing method olives remain a little bitterer than with the Tuscan method).

When they are ready you can season them with herbs as you like. I added garlic, chili pepper flakes and fennel seeds and covered them in oil (oil is optional but I like them best this way). To do so, make a layer of olives at the bottom of an airtight jar. Sprinkle with seasoning and make another layer. Go on till the jar is full. Gently press olives before adding new layers. If you chose to add oil, be careful not to leave spaces (air bubbles) otherwise the preserving process would be affected.

Crushed olives

Conserve di Olive

L’autunno è il periodo del raccolto: le mele maturano, l’uva è vendemmiata e le olive raccolte. L’uva e le olive in special modo – insieme al grano – sono frutti della terra insostituibili: il vino e l’olio sono alla base della nostra dieta e della nostra cultura culinaria. Ma, se l’uva si può mangiare così com’è, altrettanto non si può dire delle olive, che vanno trattate prima di essere consumate.

Gironzolando per i mercati in autunno, potreste essere attratti da ceste di olive verdi fresche e potreste essere tentati di assaggiarle così come sono. Non sia mai! Le olive verdi appena colte dall’albero sono assolutamente amare – di più, sono immangiabili. Per togliere l’amaro devono infatti essere trattate con acqua o salamoia per diversi giorni, cambiando l’acqua ogni giorno, prima che siano pronte per essere mangiate. Qui ho inserito tre ricette: due con salamoia (una toscana e una provenzale) e una per fare le olive schiacciate, un metodo molto comune nel Sud Italia.

Olive in salamoia alla toscana

Ingredienti
1 kg di olive verdi
2 lt di acqua
80 g soda caustica

Questa ricetta per fare le olive è molto semplice ma necessita di un po’ di attenzione. Lavare le olive, eliminando quelle danneggiate. Aggiungere 40 grammi di soda caustica per litro di acqua (mi raccomando, usare i guanti perché la soda caustica è corrosiva!!) Usare abbastanza acqua da coprire completamente le olive. Lasciar riposare le olive in questa soluzione per 6-7 ore, dopodiché gettarla. Coprire le olive con acqua pulita cambiando l’acqua tutti i giorni per circa una settimana o finché le olive non hanno perso l’amaro.

Adesso preparare la salamoia: bollire dell’acqua con il sale (da 50 a 100 g per litro a seconda dei gusti), lasciar raffreddare quindi versarla sulle olive messe in un barattolo di vetro (con sottovuoto o con tappo a vite). Aspettare circa una settimana prima di consumare.


Top: Provençal olive pickles; bottom: crushed olives


Olive in salamoia alla provenzale

Dopo aver trattato le olive come spiegato sopra, potete aromatizzarle a vostro piacere. Questo è uno dei metodi in uso in Provenza. Io ho usato il limone, anche se l’arancia sarebbe più corretta.

Ingredienti
1 kg di olive trattate (come spiegato sopra)
50-100 g di sale per litro di acqua (a seconda dei gusti)
1 foglia di alloro
una manciata di semi di finocchio
15 semi di coriandolo
la scorza di un limone (o di 1/4 di arancia)

Far bollire tutti gli ingredienti in abbondante acqua per circa 15 minuti, lasciar raffreddare e versare sulle olive messe nei barattoli. Aspettare circa una settimana prima di consumare.

Olive schiacciate

Schiacciare le olive è un metodo molto comune di prepararle nel Sud Italia. Per farlo, dovete letteralmente schiacciarle una alla volta con un martello o un pestello o qualunque altro utensile adatto allo scopo così che il nocciolo venga fuori e possa essere rimosso (conviene usare i guanti perché le olive macchiano). Una volta che sono tutte schiacciate, coprirle con una salamoia fatta con 50-100 grammi di sale per litro di acqua. Cambiare la salamoia ogni giorno per 3-4 giorni. Immergere le olive in acqua senza sale per altri 3-4 giorni, cambiando l’acqua tutti i giorni. Ci può volere anche più tempo a seconda di quanto sono amare le olive (notare che le olive schiacciate rimangono comunque un po’ più amare rispetto al metodo della salamoia toscana).

Quando sono pronte, potete condirle a piacimento. Io ho aggiunto aglio, peperoncino e semi di finocchio e le ho coperte di olio (l’olio è opzionale ma a me piace di più). Per prepararle, fare uno strato di olive in un barattolo di vetro. Condire a piacimento e coprire con un altro strato. Continuare fino a quando il barattolo è pieno. Premere delicatamente le olive prima di aggiungere un altro strato. Se decidete di aggiungere olio, attenti a non lasciare spazi vuoti (bolle d’aria) altrimenti il processo di conservazione potrebbe risentirne.
Autumn is to me the orange season: pumpkins, persimmons and red-yellowish leaves decorate homes, landscapes and also markets. A joy to the eye! Squash, of course, is the queen of orange vegetables. Though not very tasty if taken alone, you can cook it in a lot of different manners, all of them absolutely scrumptious.

Butternut squash risotto (or pumpkin risotto, as well) is a seasonal dish typically from Northern Italy (all the area around Mantua is famous for producing squashes). I personally adore risottos and this is one of my favorite. To enhance the squash flavor, I love to add some chili peppers (a gift for my husband) as well as cloves and nutmeg for a very perfumed and autumnal note.

Ingredients

350 g (12.6 oz) butternut squash, peeled and cubed
150 g (5.3 oz) Arborio rice
600 ml hot vegetable stock
2 shallots
4-5 cloves
2 small dried chili peppers
3 tbsps extravergine olive oil
20 g (0.6 oz) butter
1 tbsp grated parmigiano reggiano (parmesan cheese)
freshly ground white pepper
a pinch of nutmeg, freshly ground
salt to taste

Preparation time: 15-20 minutes
Cooking time: about 40 minutes

Serves 2

Heat oil in a large saucepan. Add the shallots, chili peppers and cloves and let them cook for about 2-3 minutes or until shallots are soft and golden. Add the cubed squash and cook covered for about 15 minutes, until rather soft.

Now add the uncooked rice and let it sauté for about 1-2 minutes, stirring constantly and swiftly with a wooden spoon (the rice grains should be all covered with oil but must not turn brown). Remove the cloves and chili peppers.

Pour a ladle of hot stock over the rice and let it simmer, stirring constantly to prevent rice from scorching (note that the stock must be hot because otherwise the cooking process is stopped). When the liquid is all absorbed, pour another ladle of stock, stirring all the time, and let it cook till it’s absorbed again; repeat until you have no more stock left and the rice is completely cooked (it will take about 20 minutes). This method of adding a ladleful of stock at a time allows rice starch to be released thus giving risotto a very creamy texture. The risotto is ready when it’s al dente, that is grains are tender but rather firm, though not hard (if for any reason the rice is not done yet, add some hot water as you did with the stock and keep cooking).

At this point, remove the risotto from heat. Stir in parmesan and butter and finally nutmeg and white pepper. If the vegetable stock is already salted, adding more salt would be probably unnecessary. In any case, wait until parmesan is stirred in before adjusting the seasoning, because it is a rather tasty cheese itself.

Serve immediately.

Risotto profumato alla Zucca

L’autunno per me è la stagione arancione: zucche, cachi e foglie rosse e gialle decorano le case, i paesaggi e anche i supermercati. Una gioia per gli occhi! Le zucche, ovviamente, sono le regine degli ortaggi arancioni. Pur non essendo molto saporite di suo, possono essere cotte in mille modi diversi, tutti deliziosi.

Il risotto alla zucca è un piatto tipico del nord Italia (tutta l’area intorno a Mantova è famosa per la produzione di zucche). Personalmente, adoro i risotti e questo è uno dei miei preferiti. Per dare più sapore alla zucca, mi piace aggiungere un po’ di peperoncino (un regalo per mio marito), così come chiodi di garofano e noce moscata per dare un tocco molto autunnale e profumato.

Ingredienti

350 g di zucca pelata e tagliata a cubetti
150 g di riso Arborio
600 ml di brodo vegetale caldo
2 scalogni
4-5 chiodi di garofano
2 peperoncini secchi
3 cucchiai di olio extravergine di oliva
20 g di burro
1 cucchiaio di parmigiano reggiano grattugiato
pepe bianco macinato al momento
un pizzico di noce moscata macinata al momento
sale q.b.

Tempo di preparazione: 15-20 minuti
Tempo di cottura: circa 40 minuti

Per 2 persone

Riscaldare l’olio in una padella grande. Aggiungere gli scalogni, i peperoncini e i chiodi di garofano e cuocere per circa 2-3 minuti fino a che gli scalogni non risultano morbidi e dorati. Aggiungere la zucca a cubetti e cuocere coperta per circa 15 minuti, finché non è piuttosto morbida.

Aggiungere il riso non cotto e farlo tostare per circa 1-2 minuti, mescolando continuamente e velocemente con un mestolo di legno (i chicchi di riso devono essere ricoperti di olio ma non devono diventare marroni). Togliere i chiodi di garofano e i peperoncini.

Versare un mestolo di brodo caldo sul riso e lasciar cuocere mescolando continuamente per evitare che il riso si attacchi (notare che il brodo deve essere caldo altrimenti la cottura si interrompe). Quando il liquido si è ritirato, aggiungere un altro mestolo di brodo, sempre mescolando, e cuocere finché non si è nuovamente ritirato; ripetere fino a che non sia rimasto più brodo e il riso sia cotto (ci vorranno circa 20 minuti). Questo metodo di aggiungere un mestolo di brodo alla volta fa sì che vengano rilasciati gli amidi del riso, ottenendo così un risotto molto cremoso. Il risotto è pronto quando è al dente, quando cioè i chicci sono morbidi ma ancora abbastanza durini (se, per qualche ragione, il riso non è ancora cotto, aggiungere acqua come fatto col brodo e continuare a cuocere).

A questo punto togliere il risotto dal fuoco. Mantecare con il burro e il parmigiano e infine aggiungere il pepe e la noce moscata. Se il brodo era già salato, probabilmente non è necessario aggiungere altro sale. In ogni caso, aspettare fino a che non è stato aggiunto il parmigiano, visto che è un formaggio molto saporito di suo.

Servire subito.


‘Chestnuts roasting on an open fire…’, Nat King Cole sang many years ago. It’s not Christmas time yet, but it’s time for chestnuts. And judging by the sudden change in the weather in this second half of October, winter is just around the corner (only a couple of weeks ago I was extolling the beauty of our glorious Indian Summer… definitely, we don’t have the in-between seasons anymore, as we use to say in Italy).

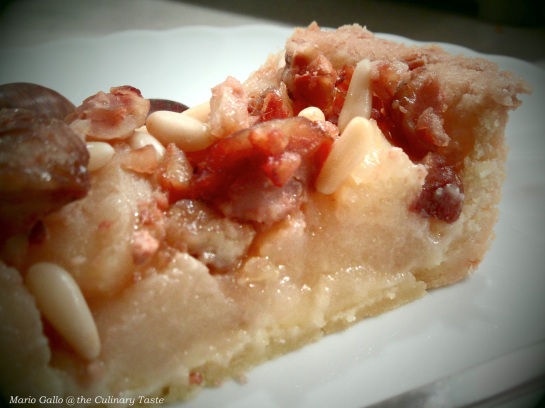
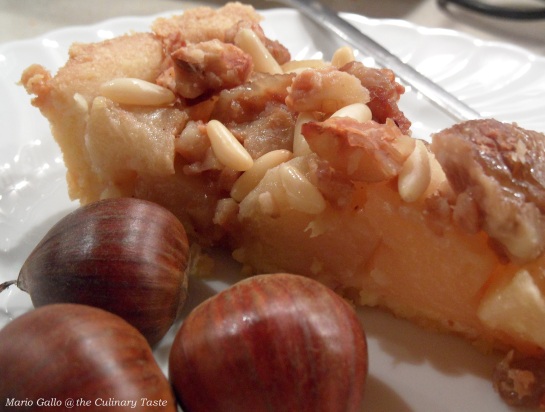
Being so cold outside, I felt like having a warm, heartening tart to cheer up these grey rainy days. We had plenty of chestnuts at home (coming from the Appenines, a gift from a neighbor) and apples, too, so I decided to make something of them. I peeled the chestnuts (arm yourselves with patience because it’s a nerve-straining, demanding job) and boiled them together with sugar and vanilla. Then I cooked the apples with butter and honey (home-made bitterish honey from our Calabrian great-aunts – God bless them!). And finally I made the pastry using my mom’s long-tested (and long-appreciated) recipe. The result was excellent – my husband and his friend ate it up in a second (they left just a slice for me and my parents to taste it…).

Ingredients

For the pastry:
3 cups flour, sifted
2 egg yolks
1 cup sugar
150 g butter, at room temperature
1 lemon zest, grated
pinch of salt

For the apples:
4 cooking apples
2 tbsps honey
30 g butter

For the chestnuts:
200-300 g chestnuts
1 vanilla pod
1/3 cup sugar

30 g pine kernels

Preparation time: 30 minutes for peeling chestnuts, 10 minutes for peeling apples, 20 minutes for kneading, 30 minutes for removing pellicule from chestnuts, 15 minutes for assembling the tart
Resting time: 1 hour
Cooking time: 1 hour 30 minutes

Start with making the pastry. On a smooth surface (preferably marble) pour flour, sugar, egg yolks and salt and knead with your hands until you form a dough (add flour if needed). Add lemon zest and knead again. Wrap the dough in a cooking plastic wrap and let it rest in the fridge for about an hour.

In the meantime, peel the chestnuts (I peeled only the external husk because the inner pellicule it’s hard to remove in this phase). Place the chestnut in a saucepan with sugar and the vanilla pod and cover with water. Let them boil for about an hour until soft and tender (with the discarded vanilla pod, you can make vanilla sugar). Now that they are cooked, you can remove the pellicule which has already partly come off.

Peel the apples, core them and cut them into slices. Place them in a frying pan with butter and honey and cooked them covered for about 30 minutes until they are soft.

Now preheat oven to 200°C (400°F). Take the dough out of the fridge and roll it with a rolling pin over a surface sprinkled with flour to form a circle a little wider than the baking dish. Place the rolled dough into the baking dish and riddle it with a fork. Fill with the apples (with a little cooking liquid), then with the chestnuts (pellicule removed and coarsly crumbled) and finally pine kernels.

Bake in the preheated oven for about 30 minutes.

Crostata di castagne e mele

‘Chestnuts roasting on an open fire…’ (‘Le castagne arrostiscono sul fuoco all’aperto..’), cantava Nat King Cole diversi anni fa. Non è ancora Natale, ma è tempo di castagne. E, a giudicare dall’improvviso cambiamento del tempo in questa seconda metà di ottobre, l’inverno è quasi alle porte (solo un paio di settimane fa cantavo la bellezza della nostra gloriosa estate indiana… davvero, non ci sono più le mezze stagioni).

Facendo così freddo fuori, mi è venuta voglia di una crostata calda e rincuorante per rallegrare queste grigie giornate piovose. Avevamo un bel po’ di castagne a casa (provenienti dall’Appennino, un regalo di una vicina) e anche di mele, così ho deciso di farci qualcosa. Ho sbucciato le castagne (armatevi di santa pazienza perché è un lavoro impegnativo) e le ho bollite con zucchero e vaniglia. Poi ho cotto le mele con burro e miele (miele casalingo e amarognolo delle prozie calabresi – Dio le benedica!). Infine, ho preparato la pasta per la crostata secondo la ricetta a lungo testata (e a lungo apprezzata) di mia madre. Il risultato è stato eccellente – mio marito e il suo amico se la sono fatta fuori in un baleno (lasciandone giusto una fettina per me e i miei…).

Ingredienti

Per la pasta:
3 tazze di farina setacciata
2 tuorli
1 tazza di zucchero
150 g di burro a temperatura ambiente
1 scorza di limone grattugiata
un pizzico di sale

Per le mele:
4 mele tipo Golden
2 cucchiai di miele
30 g di burro

Per le castagne:
200-300 g di castagne
1 baccello di vaniglia
1/3 di tazza di zucchero

30 g di pinoli

Tempo di preparazione: 30 minuti per sbucciare le castagne, 10 minuti per sbucciare le mele, 20 minuti per l’impasto, 30 minuti per rimuovere la pellicina dalle castagne, 15 minuti per assemblare la crostata
Tempo di riposo: 1 ora
Tempo di cottura: 1 ora e mezzo

Cominciare con l’impasto. Su una superficie liscia (meglio di marmo) versare la farina, lo zucchero, i tuorli e il sale e impastare con le mani fino ad ottenere una palla liscia. Aggiungere la scorza grattugiata e impastare ancora. Avvolgere la palla di pasta in un foglio di pellicola trasparente e lasciar riposare in frigo per un’ora circa.

Nel frattempo, sbucciare le castagne (io ho tolto solo la buccia esterna perché la pellicina interna è difficile da rimuovere in questa fase). Mettere le castagne in una pentola con lo zucchero e la vaniglia e coprire con acqua. Far bollire per circa un’ora fino a che non sono tenere (con la vaniglia scartata potete preparare lo zucchero alla vaniglia). Una volta che le castagne sono cotte, si possono finalmente rimuovere le pellicine che si sono già in parte staccate.

Sbucciare le mele, eliminare il torsolo e tagliarle a fette. Metterle in una padella con il burro e il miele e cuocerle coperte per circa mezz’ora fino a che non sono morbide.

Adesso preriscaldare il forno a 200°C. Tirar fuori dal frigo la pasta e stenderla con un mattarello fino a formare un cerchio leggermente più grande della tortiera. Stendere la pasta nella tortiera e bucherellarla con una forchetta. Riempire con le mele (e con un po’ del liquido di cottura), poi con le castagne (avendo rimosso le pellicine e sbriciolando le castagne grossolanamente), e infine con i pinoli.

Cuocere in forno per circa mezz’ora.


Celeriac, again. I know I’m repetitive, but I had bought too many at the supermarket and couldn’t make only soups (though Mario adores it and would eat it every day). As I had already explained in the Celeriac and Potato Soup post, this vegetable is so versatile that you can eat it cooked or raw, as you prefer. This time I added it to a very autumnal salad, made with oranges, radishes and Macadamia nuts from the Amazon Forest (Madamia nuts are an up-to-the-minute add, because I saw them at the market and was too curious to taste them: delicious!!).

It’s a very simple salad you can eat alone or as a side dish. Cutting oranges takes a little time, though, because you have to supreme them (that is, remove skin, pith, membranes and seeds and then cut them into wedges), otherwise their result as a salad ingredient is terrible. To help, I post here a video (it’s in Italian, but it’s easy to understand) and a link to a cute blog where it’s all very well explained.

Ingredients

2 oranges, supremed
100 g radishes, washed and cut into wedges
50 g celeriac, washed and julienne cut
50 g Macadamia nuts, chopped

For the dressing:
2 tbsps extravergine olive oil
1/2 tbsp balsamic vinegar
juice of 1/2 orange
a pinch of salt
a pinch of freshly ground pepper

Preparation time: about 20 minutes

Serves 2

In a bowl combine vegetables. Mix the dressing ingredients in a separate bowl, stir them into the vegetables and serve.

Insalata di Arance e Sedano Rapa

Sedano rapa, ancora. Lo so che sono ripetitiva, ma ne avevo comprato troppo al supermercato e non potevo farci solo creme (anche se Mario le adora e ne mangerebbe tutti i giorni). Come spiegato nella Crema di Sedano Rapa e Patate, questa è una verdura estremamente versatile che si può mangiare sia cotta che cruda. Questa volta l’ho aggiunta a un’insalata molto autunnale composta da arance, ravanelli e noci macadamia della Foresta Amazzonica (le noci macadamia sono un’aggiunta dell’ultimo minuto perché le ho viste al supermercato ed ero troppo curiosa di provarle: buonissime!!).

Questa è una ricetta molto semplice che si può consumare da sola o come contorno. Solo per tagliare le arance ci vuole un po’ di tempo, perché vanno pelate al vivo (cioè, pelate, eliminati semi e pellicine e poi tagliate a spicchi), altrimenti si rovina il risultato finale dell’insalata. Per far capire, posto qui un video e un link a un blog molto carino dove è spiegato tutto veramente bene.

Ingredienti

2 arance, pelate al vivo
100 g di ravanelli, lavati e tagliati a spicchi
50 g di sedano rapa, lavato e tagliato a julienne
50 g noci macadamia, a pezzi grossolani

Per il condimento:
2 cucchiai di olio extravergine di oliva
1/2 cucchiaio di aceto balsamico
succo di 1/2 arancia
un pizzico di sale
un pizzico di pepe macinato al momento

Tempo di preparazione: circa 20 minuti

Per 2 persone

Mescolare le verdure in una ciotola. Separatamente mischiare gli ingredienti del condimento e versarli sull’insalata. Servire.

Autumn should be called the orange season: all fruits and foliages are but shades of blazing reds and bright yellows, oranges and browns. Pumpkins, pomegranates, persimmons cheer up dinners with their flaming colors and delicious tastes. Persimmons are one of the commonest fruits of the season. You can find persimmon trees in many old Tuscan gardens, together with pomegranate and apple trees. Vanilla persimmons are a rarer variety and, despite their name, their flavor has nothing to do with vanilla. Their flesh is crunchy and hard like apples, unlike common persimmons that resembles peaches.

I saw vanilla persimmons at the market and wanted to give them a try: I had no idea neither how they tasted like nor how they would come out in a mousse form, but I was too curious and they were so beautiful. Well, in the end I was satisfied with the result: their savor is not particularly strong (it’s rather delicate, I dare say) but it matched pretty well with cream and Malvasia. If you’re looking for something different, they’re worth giving a try.

Ingredients

200 g vanilla persimmons
250 ml whipped cream
100 ml milk
100 g vanilla sugar
1 tbsp Malvasia wine
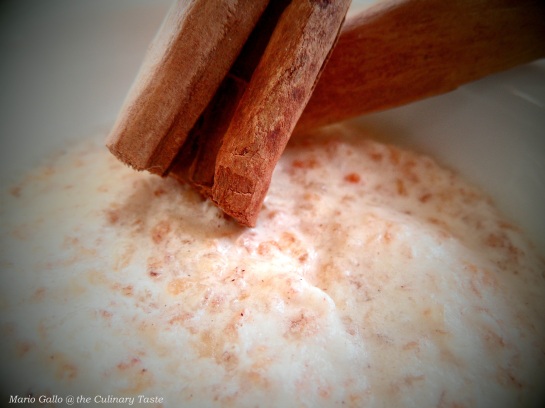
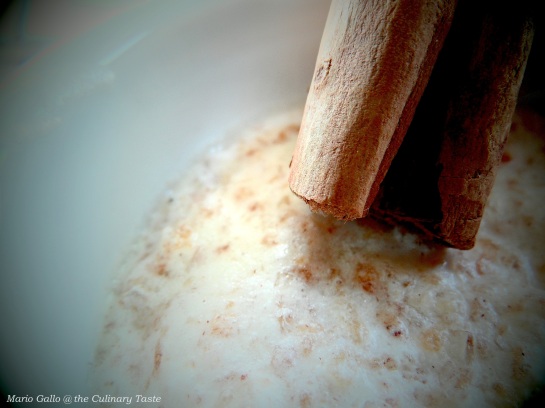
1 cinnamon stick

Preparation time: 40 minutes
Refrigerating time: 2-3 hours

Serves 4

Wash, peel and remove seeds from persimmons. Mash them in a food processor. Simmer milk with sugar, cinnamon and Malvasia. Strain the milk and add it to persimmons; mix well. Stir in whipped cream. Pour mousse into dessert bowls and refrigerate for 2-3 hours before serving.

I made a mousse, but you can try to make a pudding, instead. You just need to add about 10 grams (or 2 sheets) of gelatine: soak gelatine in water at room temperature till soft, squeeze it and stir it into the lukewarm milk. Then add milk to persimmons and proceed as explained above.

Mousse di Cachi Vaniglia

L’autunno dovrebbe essere chiamato la stagione arancione: foglie e frutti non sono altro che toni di rossi fiammanti e gialli accesi, di arancioni e di marroni. Zucche, melagrane e cachi rallegrano le tavole con i loro colori fiammanti e i loro sapori deliziosi. I cachi, in particolare, sono tra i più comuni frutti di questa stagione e se ne trovano in molti vecchi giardini toscani, assieme ai meli e ai melograni. I cachi vaniglia sono una varietà più rara e, nonostante il nome, il loro sapore con la vaniglia non ha niente a che fare. La loro polpa è croccanre e dura come quella delle mele, a differenza dei cachi comuni che sono morbidi e ricordano le pesche.

Ho trovato i cachi vaniglia al supermercato e mi è venuta voglia di provarli: non avevo idea di che sapore avessero né di come sarebbero venuti fuori in una mousse, ma ero troppo curiosa e loro erano bellissimi. Beh, alla fine sono soddisfatta del risultato: il sapore non è particolarmente forte (anzi, è piuttosto delicato), ma si sposa bene con la panna e la Malvasia. Se cercate qualcosa di diverso, vale la pena di provare.

Ingredienti

200 g di cachi vaniglia
250 ml di panna montata
100 ml di latte
100 g zucchero alla vaniglia
1 cucchiaio di Malvasia
1 stecca di cannella

Tempo di preparazione: 40 minuti
Tempo in frigo: 2-3 ore

Per 4 persone

Lavare e pelare i cachi; togliere i semi. Passare i cachi al passaverdura o al mixer. Far riscaldare il latte con lo zucchero, la cannella e la Malvasia. Filtrare il latte e aggiungerlo ai cachi. Aggiungere mescolando la panna montata. Versare nelle coppette e tenere in frigo per 2-3 ore prima di servire.

Io ho preparato una mousse, ma volendo si può fare un budino. Basta aggiungere circa 10 grammi (2 fogli) di colla di pesce (gelatina alimentare): tenere in ammollo la gelatina in acqua a temperatura ambiente fino a quando diventa morbida, strizzarla e scioglierla nel latte tiepido. Aggiungere il latte ai cachi e procedere come spiegato sopra.


Celeriac is probably the ugliest among vegetables, but it’s one the most versatile. Due to its delicate flavor (it resembles celery but it’s a little sweeter), you can eat it cooked or raw and it’s the perfect addition to salads or pinzimonio (an Italian sauce of oil, salt and pepper in which raw vegetables are dipped). Cooked and mashed, it makes a wonderful and aromatic soup you can eat alone or with some croutons.

To make this soup I added some potatoes (as I usually do with every soup) for a smoother texture. You can use those of the vegetable stock or cooked them (peeled and cut into chunks) together with celeriac.

Ingredients

1 celeriac, peeled and chopped
3 small potatoes, peeled and chopped
2 shallots, thinly sliced
1 garlic clove
400 ml vegetable stock
2 tbsps extravergine olive oil
salt and pepper to taste
1 tsp chive, chopped, for decoration

Preparation time: 15-20 minutes
Cooking time: 25-30 minutes

Serves 2

Heat oil in a saucepan, add shallots and garlic and let them fry for about 1-2 minutes until soft and lightly golden. Remove garlic. Add celeriac (and potatoes if they aren’t already cooked), salt, pepper and cook for further 1-2 minutes. Add vegetable stock and cook for about 20 minutes till vegetables are soft. Add potatoes from vegetable stock (if you haven’t added them early). Remove from heat and blend with a stick blender until you have a smooth cream. Decorate with chive.

Crema di sedano rapa e patate

Il sedano rapa è probabilmente il più brutto tra tutte le verdure, eppure è uno dei più versatili. Grazie al suo sapore delicato (ricorda il sedano, ma è leggermente più dolce) è ottimo nell’insalata o nel pinzimonio. Cotto e passato, poi, regala una crema deliziosa e aromatica da mangiarsi da sola o accompagnata da pane abbrustolito.

Per questa crema ho aggiunto anche le patate (come faccio di solito) per avere un tocco più morbido. Volendo, si possono usare le patate del brodo vegetale o cuocerle direttamente (sbucciate e fatte a pezzi) insieme al sedano rapa.

Ingredienti

1 sedano rapa, pelato e tagliato a pezzi
3 patate piccole, sbucciate e tagliate a pezzi
2 scalogni, affettati fini
1 spicchio d’aglio
400 ml
brodo vegetale
2 cucchiai di olio extravergine di oliva
sale e pepe q.b.
1 cucchiaino di erba cipollina tritata per decorare

Tempo di preparazione: 15-20 minuti
Tempo di cottura: 25-30 minuti

Per 2 persone

Scaldare l’olio in una padella e friggere gli scalogni e l’aglio per 1-2 minuti fino a che non siano leggermente dorati. Rimuovere l’aglio. Aggiungere il sedano rapa (e le patate se non sono già cotte), sale, pepe e cuocere per altri 1-2 minuti. Versare il brodo vegetale e cuocere per circa 20 minuti, fino a quando la verdura non è morbida. Aggiungere le patate del brodo vegetale (se non le avete già aggiunte prima). Togliere dal fuoco e passare al mixer fino ad ottenere una crema omogenea. Decorare con l’erba cipollina.

Submitted to Ti Cucino Così – Zuppe e Minestre Contest
Partecipa al contest di Ti Cucino Così – Zuppe e Minestre

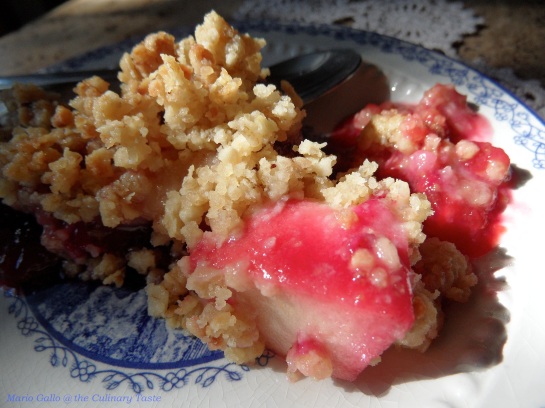
Otherwise called ‘Leftover Crumble’ for this cake was made to get rid of some fruit that was languishing in my kitchen. Being apples and plums too ripe to make fruit salad, I chose to make the most of them by baking another crumble. Moreover, I wanted to celebrate Grandparents’ Day with a cake my parents could appreciate (my mom especially, because she loves cakes and she loves crumbles). For the topping I used the End-of-Summer Greengage Crumble recipe, while I added some cloves to the filling for a more aromatic flavor. Well, it vanished in a flash, so it shouldn’t be that bad.

Ingredients

For the filling:
about 10 damson plums
1 cooking apple
3 tbsps sugar
4-5 cloves
juice of 1 lime

Preparation time: 30 to 40 minutes
Cooking time: 30 minutes

Preheat oven to 190°C (375°F). Wash the plums, halve, pit and roughly cut them into pieces (not too small). Peel, core and cut the apple into chunks. Mix the plums and apple in a bowl with sugar, cloves and lime juice, and put aside. Proceed as for the End-of-Summer Greengage Crumble.

Crumble di Mele e Prugne

Detto anche ‘Crumble degli avanzi’ perché questo docle è stato fatto per finire della frutta che stava languendo in cucina. Visto che le mele e le prugne erano troppo mature per farci una macedonia, ho optato per fare un altro crumble. Inoltre volevo festeggiare la Festa dei Nonni con un dolce che potesse piacere ai miei (specialmente alla mamma, che adora le torte e adora i crumble). Per la copertura, ho seguito la ricetta del Crumble di Fine Estate di Susine Claudie, mentre ho aggiunto dei chiodi di garofano alla frutta per un sapore più aromatico. Beh, vista la velocità con cui è sparito, non doveva essere tanto male.

Ingredienti

Per il ripieno:
circa 10 prugne
1 mela tipo Golden
3 cucchiai di zucchero
4-5 chiodi di garofano
succo di 1 lime

Tempo di preparazione: da 30 a 40 minuti
Tempo di cottura: 30 minuti

Preriscaldare il forno a 190°C. Lavare le prugne, tagliarle a metà, togliere il nocciolo e tagliarle a piccoli pezzi. Sbucciare le mele, togliere il torsolo e tagliarle a pezzetti. Mescolare le prugne e le mele con lo zucchero, i chiodi di garofano e il succo di lime e mettere da parte. Procedere come per il Crumble di Fine Estate di Susine Claudie.

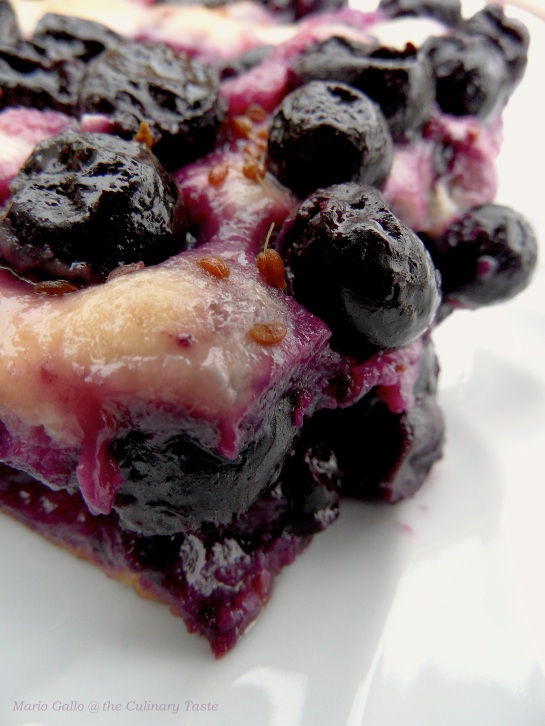
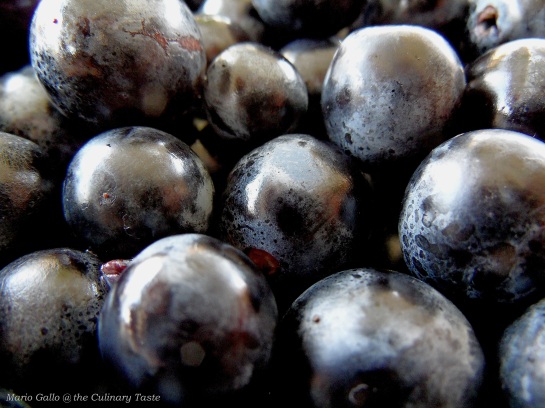
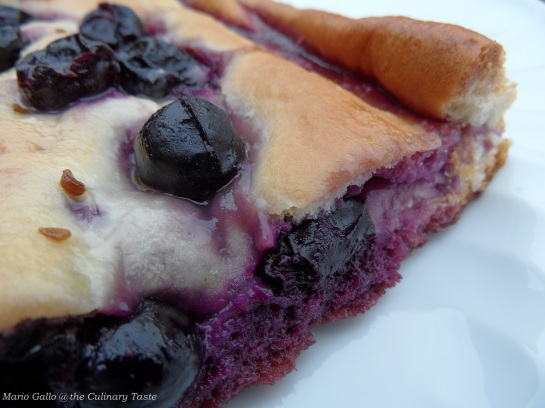
Literally ‘bread with grapes’, pan con l’uva is one of the traditional cakes of early autumn in my home town Prato and in the Florentine area. Also known under the name ‘Schiacciata con l’uva’ (‘stiacciata’ as we say in Tuscany), it is made only with dough, grapes, olive oil and sugar. The simplicity of its ingredients reveals a peasant origin, this being a dish closely connected to vintage time. Only grapes unsuitable for good wine-making were actually employed, particularly the so called canaiolo variety which has very small black round grapes. Baking these grapes with dough to make a sweet bread was indeed a way to make the most of food that otherwise had to be thrown away – an unforgivable waste – in a period when every woman made bread at home. Preparing pan con l’uva is very easy for it basically consists in two layers of dough with grapes and sugar inside.

For this recipe I must thank my husband Mario who did the greatest part of the job, kneading bread dough with his own hand. Fortunately, he’s exceptionally talented, maybe because he’s the grandson of two bakers and he had some tricks taught by his Calabrian grandmother. With awesome results, I dare say.

As suggested by a friend of my mother’s (who makes delicious pan con l’uva), aniseed can be added for a liquorice-fennel-like taste.

Ingredients

1,5 kg canaiolo grapes
450 g flour (plus some for kneading)
200 ml water at room temperature
25 g baker’s yeast
10 tbsps (125 g) caster sugar
8 tbsps extravergine olive oil
1 tsp aniseed
pinch of salt

Preparation time: 30 minutes for kneading plus 30-40 minutes for preparing grapes and assembling the cake
Rising time: 1 hour
Baking time: 1 hour

Wash and clean grapes. Preheat oven to 180°C (about 350°F).

Pour flour directly onto a smooth surface (marble or glass). Make a hole in the center and crumble yeast into it together with a pinch of salt. Add little water. With your forefinger start turning ingredients around so that a little dough ball is formed (remaining flour will be all around). Little by little add small amounts of water and knead with a finger. When the dough ball is pretty big, start kneading using both hands until dough is soft and smooth. At this point, gradually add four tablespoons of sugar and four tablespoons of oil. If dough is too dry, add a little more water; otherwise, if it’s too damp, add a little flour.

Form a ball with dough and let it rise at room temperature for about an hour wrapped in tea cloths (rising depends on temperature: it can take half an hour in summer or up to an hour and a half in winter).

When the dough has become twice its size, split it into 1/3 and 2/3 parts. Roll out 2/3 of dough with a rolling pin directly onto baking paper (that will be placed over a baking sheet). Riddle the sheet of pastry with a fork so that it won’t swell during baking. Spread over about 1,1-1,2 kg of grapes; drizzle two tablespoons of oil and sprinkle with 2 tablespoons of sugar and 1/2 teaspoon of aniseed. Roll out the remaining 1/3 dough and lay it over grapes. Fold the pastry edges up to ‘close’ the cake. Spread the remaining grapes, drizzle two tablespoons of oil and sprinkle with four tablespoons of sugar and 1/2 teaspoon of aniseed. Bake for about an hour.

Pan con l’uva

Il pan con l’uva è uno dei dolci tradizionali di inizio autunno della mia città, Prato, e della provincia fiorentina. Noto anche come schiacciata con l’uva (‘stiacciata’ come si dice in Toscana), viene fatto semplicemente con l’impasto del pane, uva nera, olio di oliva e zucchero. La semplicità degli ingredienti rivela un’origine contadina, essendo un piatto strettamente connesso al periodo della vendemmia. Venivano infatti impiegate solo uve non particolarmente adatte alla vinificazione, come la varietà canaiolo, dai chicchi piccoli e neri. Cuocere la pasta di pane con queste uve era proprio un modo per sfruttare un alimento che altrimenti sarebbe stato gettato via, in un periodo in cui tutte le donne facevano il pane in casa. Preparare il pan con l’uva è effettivamente molto semplice, non consistendo in altro che due strati di pasta di pane con in mezzo uva e zucchero.

Per questa ricetta devo ringraziare mio marito Mario che ha fatto il grosso del lavoro, cioé l’impasto del pane. Fortunatamente è molto bravo, forse perché è il nipote di due fornai e i trucchi gli sono stati insegnati dalla nonna calabrese. Con ottimi risultati, direi.

Come suggerito da un’amica di mia madre (che fa un pan con l’uva buonissimo), si possono aggiungere semi di anice che danno un tocco di finocchio e liquirizia.

Ingredienti

1,5 kg di uva canaiolo
450 grammi di farina (più quella necessaria a impastare)
200 ml di acqua a temperatura ambiente
25 grammi di lievito di birra
10 cucchiai (125 grammi) di zucchero
8 cucchiai di olio extravergine di oliva
1 cucchiaino di semi di anice
una presa di sale

Tempo di preparazione: 30 minuti per l’impasto più 30-40 minuti per pulire l’uva e assemblare il dolce
Tempo di lievitazione: 1 ora
Tempo di cottura: 1 ora

Lavare e schiccare l’uva. Preriscaldare il forno a 180°C.

Versare la farina a montagnola sopra un piano di lavoro liscio (marmo o vetro). Fare una fontana al centro e sbriciolarvi dentro il lievito con il sale. Aggiungere poca acqua. Con il dito indice, iniziare a girare impastando gli ingredienti per formare una pallina piccola di pasta (tutto intorno rimarrà la farina). A poco a poco aggiungere piccole quantità di acqua e impastare girando con il dito. Quando la palla è piuttosto grande, impastare con entrambe le mani fino a che l’impasto non risulta liscio e morbido. A questo punto, aggiungere poco alla volta quattro cucchiai di zucchero e quattro di olio e continuare a impastare. Se l’impasto risulta troppo secco e duro, aggiungere poca acqua; se invece è troppo umido, aggiungere un pizzico di farina.

Formare una palla e lasciarla lievitare per un’ora a temperatura ambiente avvolta da canovacci (la durata della lievitazione dipende dalla temperatura dell’ambiente: d’estate basta mezz’ora, mentre d’inverno può occorrere anche un’ora e mezzo).

Quando l’impasto avrà raddoppiato il suo volume, dividerlo in 1/3 e 2/3. Stendere con un mattarello i 2/3 dell’impasto in una sfoglia sottile direttamente su un foglio di carta forno (da trasferire poi su una placca da forno o su una pirofila dai bordi alti). Bucherellare la sfoglia con i rebbi di una forchetta affinché l’impasto non si gonfi durante la cottura. Collocare sopra l’impasto circa 1,1-1,2 kg di uva; spolverizzare con due cucchiai di zucchero, due di olio e mezzo cucchiaino di semi di anice. Stendere il rimanente 1/3 di sfoglia e poggiarlo sull’uva. Ripiegare all’insù i margini dello strato di pasta sottostante, in modo da chiudere l’impasto. Mettere sopra la rimanente uva e spolverizzare con quattro cucchiai di zucchero, due di olio e mezzo cucchiaino di semi di anice. Cuocere in forno per circa un’ora.


Canaiolo Grape (Vine)


Pan Con L’uva

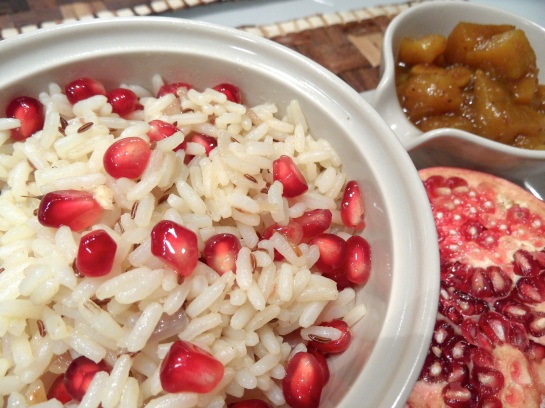
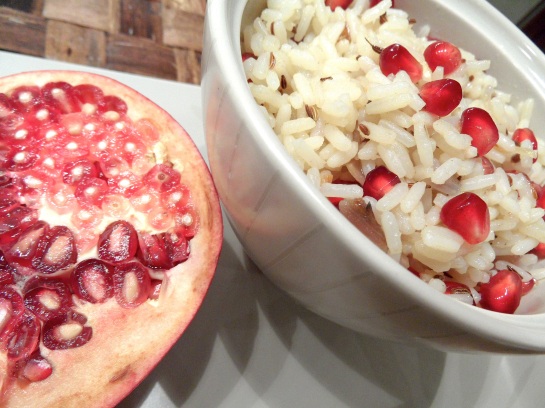
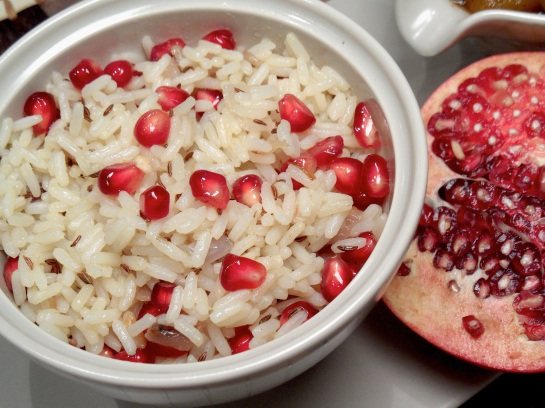
I’ve had this recipe in mind for a long time, but I’ve always be restrained by the want of pomegranates. My pomegranate tree is laden with fruits by now, but they’re still unripe – I’ll have to wait till next month, probably. So, when I found pomegranates at the supermarket I made up my mind: I bought one and tried this exceedingly aromatic, perfumed rice. Well, the experiment has been a success: the pomegranate seeds add a fresher touch to the spicy warmth of cumin and cardamom, and quench the hot tangy taste of the Tandoori-style Chicken and Mango Chutney.

Ingredients

120 g Patna rice
1/2 pomegranate
1 shallot
1 tsp cumin seeds
4-5 cardamom pods
knob of butter
salt to taste

Preparation time: 30 minutes
Cooking time: 15-20 minutes

Serves 2

Soak the rice for about half an hour in a bowl full of cold water (this must totally cover the rice), changing water a couple of times: this procedure helps to eliminate rice starch. Rinse and strain the rice, then place it in a large saucepan with cold water again and bring to the boil. When the boiling point is reached, add salt and let it all boil for about ten minutes (rice grains must be slightly underdone).

In the meantime, deseed the pomegranate (start this process early, because it takes a pretty long time, though only half a pomegranate is necessary): remember to remove all the white pith from the seeds because it has a bitter taste.

Chop the shallot and place it in a frying pan with butter: cook for about 2-3 minutes, until butter is melt and shallot is lightly golden. Add cumin and cardamom seeds (you have to cut the pods to take out the seeds) and cook for further 3-4 minutes.

When rice is done, strain it and place in the frying pan with the spice and butter and sauté it for a couple of minutes. Finally stir in the pomegranate seeds.

Serve the rice with Tandoori-style Chicken and Mango Chutney.

Riso alla Melagrana

È da un pezzo che ho in mente questa ricetta, ma sono sempre stata limitata dalla mancanza di melagrane. Il mio melograno adesso è carico di frutti, ma purtroppo non sono ancora maturi e mi sa che dovrò aspettare il mese prossimo. Così, quando ho trovato le melagrane al supermercato, mi sono decisa e ho voluto provare a fare questo riso estremamente aromatico e profumato. Beh, l’esperimento è stato un successo: i chicchi di melagrana aggiungono un tocco fresco al calore speziato del cumino e del cardamomo e smorzano il sapore piccantino del Pollo alla Tandoori e del Mango Chutney.

Ingredienti

120 g di riso Patna
1/2 melagrana
1 scalogno
1 cucchiaino di semi di cumino
4-5 bacche di cardamomo
una noce di burro
sale q.b

Tempo di preparazione: 30 minuti
Tempo di cottura: 15-20 minuti

Per 2 persone

Lasciare il riso in ammollo in una bacinella d’acqua per circa mezz’ora, cambiando l’acqua un paio di volte: questo procedimento consente di eliminare l’amido in eccesso. Sciacquare e scolare il riso, quindi metterlo in una pentola con acqua fredda e portare ad ebollizione. Quando l’acqua inizia a bollire, aggiungere il sale e lasciar cuocere per una decina di minuti (i chicchi di riso devono essere leggermente al dente).

Nel frattempo, togliere i chicchi dalla melagrana (iniziate per tempo, perché il processo è lungo): ricordate di togliere tutta la pellicina bianca dai chicchi perché è amara.

Tritare lo scalogno e farlo imbiondire in una padella con il burro per circa 2-3 minuti. Aggiungere i semi di cumino e cardamomo (per avere i semi di quest’ultimo, è necessario toglierli dalle bacche) e cuocere per altri 3-4 minuti.

Quando il riso è cotto, scolarlo e versarlo nella padella con le spezie e il burro e farlo saltare un paio di minuti. Infine aggiungere i chicchi di melagrana e mescolare.

Servire con il Pollo alla Tandoori e Mango Chutney.